Enclosed Trailer Shelving Layouts

Building a tool trailer is a daunting task that takes a lot of planning, time, and work.
But plenty of contractors, plumbers, HVAC companies, and other trades businesses have created layouts that speed them up and make the job less physically demanding.
We're going to take a look at a few layouts and give some pros and cons to each one.
You'll have to decide what's best for you, but this is your starting point!
Intro to Tool Trailer Layouts
Let's lay down the ground rules for creating your trailer's layout:
- Your layout should make you efficient. Time is your most valuable resource.
- Different workflows will need different layouts. A layout for plumbing service calls will be different than a trailer layout for home renovating.
- Know how much weight you can add to your trailer. Plywood adds up and it's surprisingly easy to hit your GVWR once you add inventory and tools.
- Be flexible in your design. If you can make elements of your build easy to change, you can make adjustments to make things work better.
We've got six layouts features below:
- The Workshop
- The Ron Paulk
- The Material Hauler
- The Toolbox Carrier
- The Tool Display
- The Combo
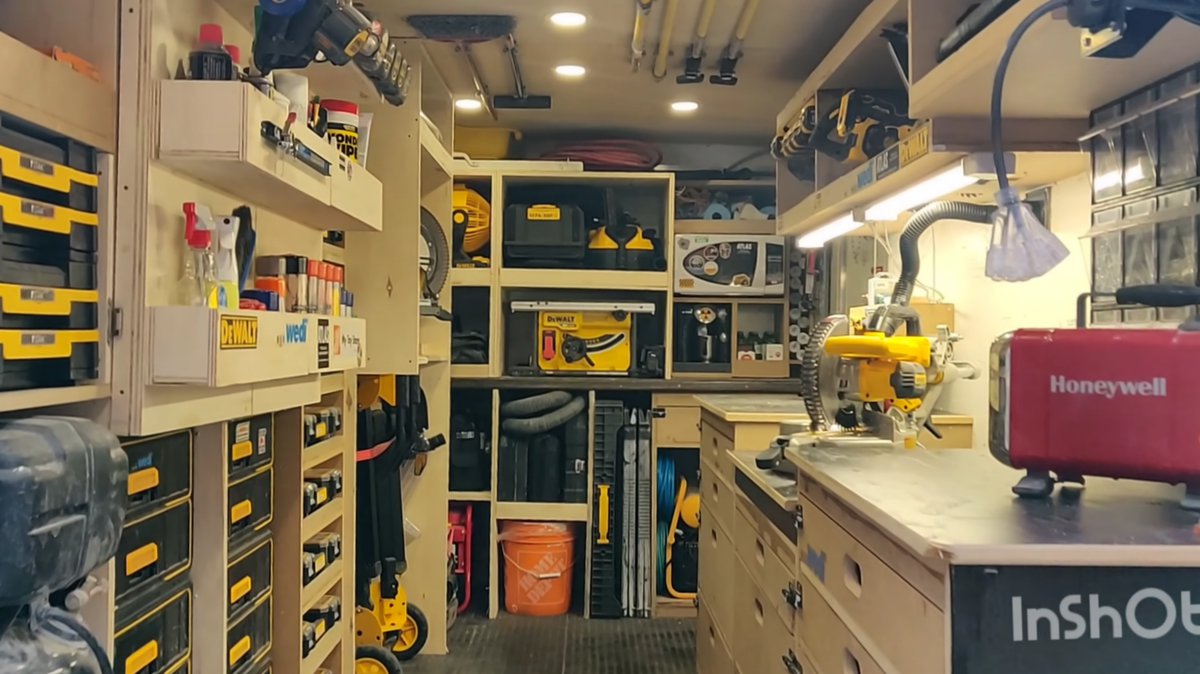
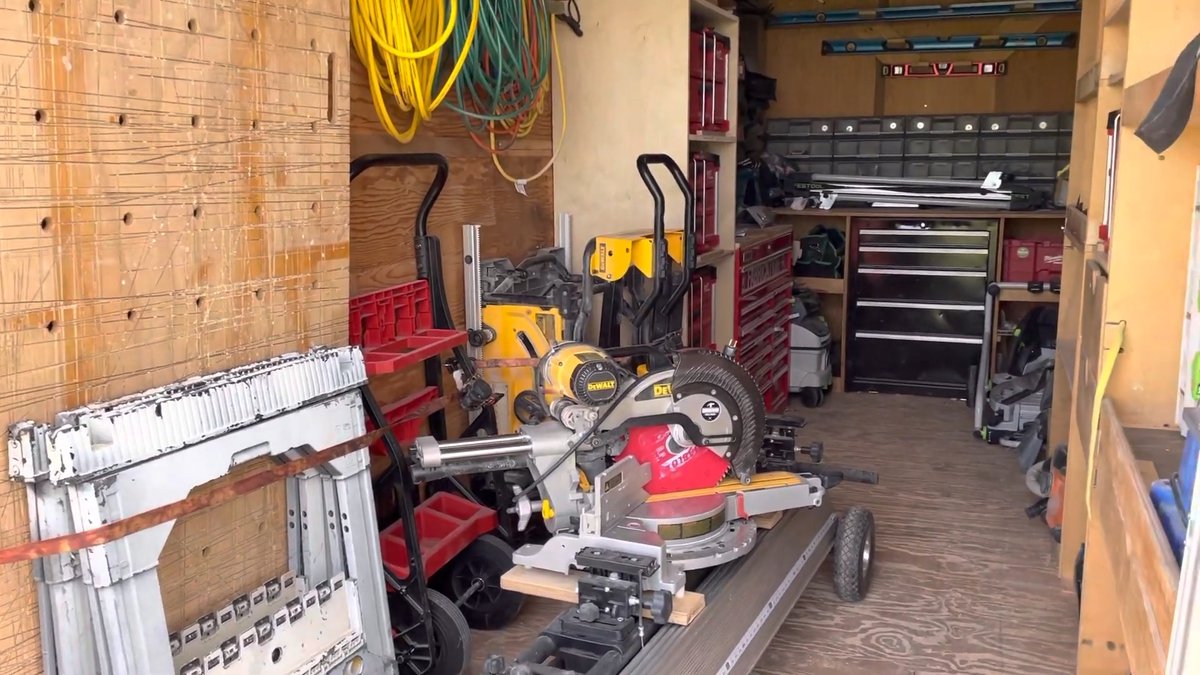
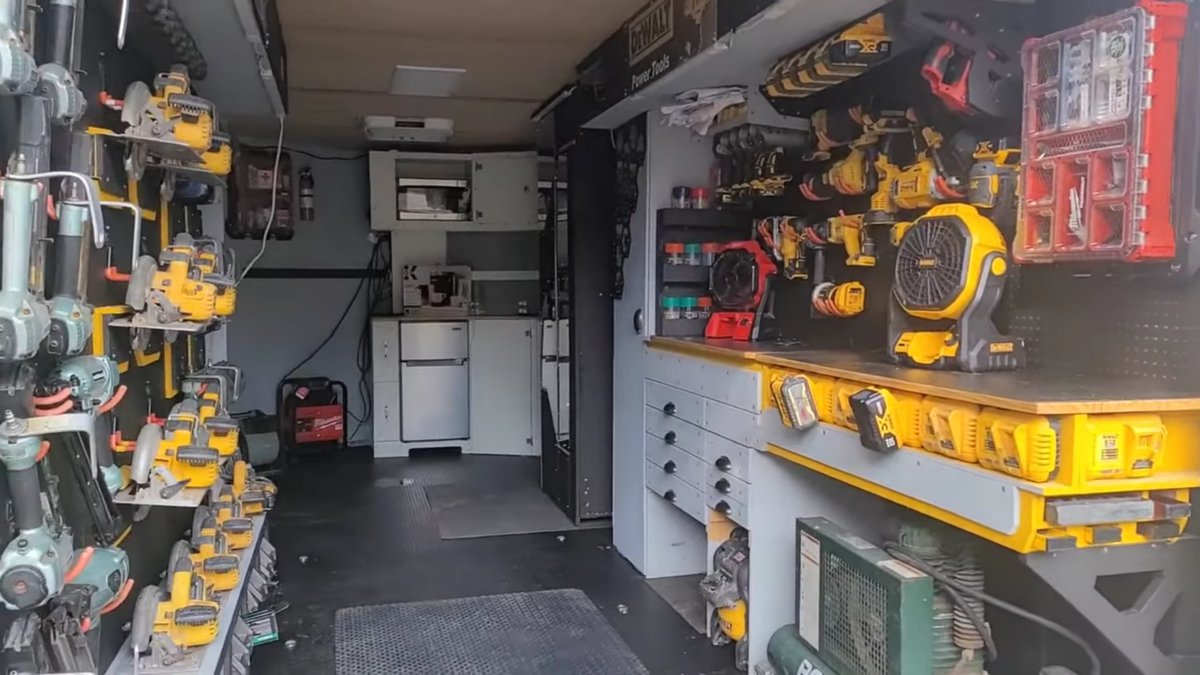
Layout #1: The Workshop
Do you need to do a significant amount of work inside your trailer?
Most tool trailers have at least a 2-4 foot long workbench for prepping and organizing projects, but the Workshop allows you to do larger projects and gives you more room to spread out.
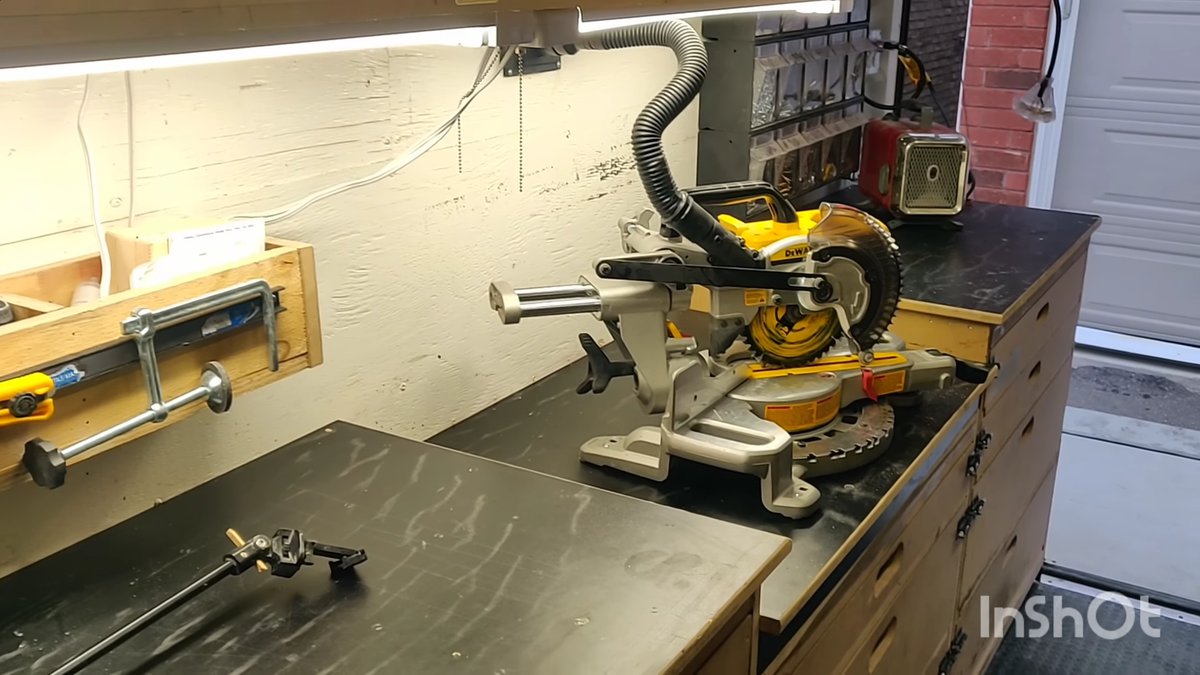
Long workbenches are the signature style of this layout, letting you get more work done inside your trailer. Having plenty of space inside mean you can cut large materials, bend HVAC duct work, thread pipe, or just have space to organize and layout projects.
The Workshop layout typically incorporates long workbenches, builtin tools, and even exhaust ports for running tools inside the trailer.
Will this layout work for you?
It depends on how you work:
It's great for doing smaller jobs in your trailer so that you aren't toting tools onto the job for what might be an hour long job. You might be used to working in an area with heat, cold, snow, or rain extremes. An indoor work space is dry and you can easily add heat or AC to your trailer to keep it more comfortable.
If you plan to run tools inside your tool trailer, you'll need to consider how you'll vent or capture fumes or sawdust. You can do this by porting exhausts to the outside or setting up blower fans. It's helpful at the end of the day to clear out dust with a battery-powered blower.
Check out these Workshop Tool Trailers:
- Asa's Saws-Inside General Contracting Tool Trailer
- Nick's Huge, House-Flippin' HVAC Tool Trailer
- Scavetta Renovation and Design's Giant Rolling DeWalt Tool Box
- Drew's In-Betweener, 5x10, Small Carpentry Trailer
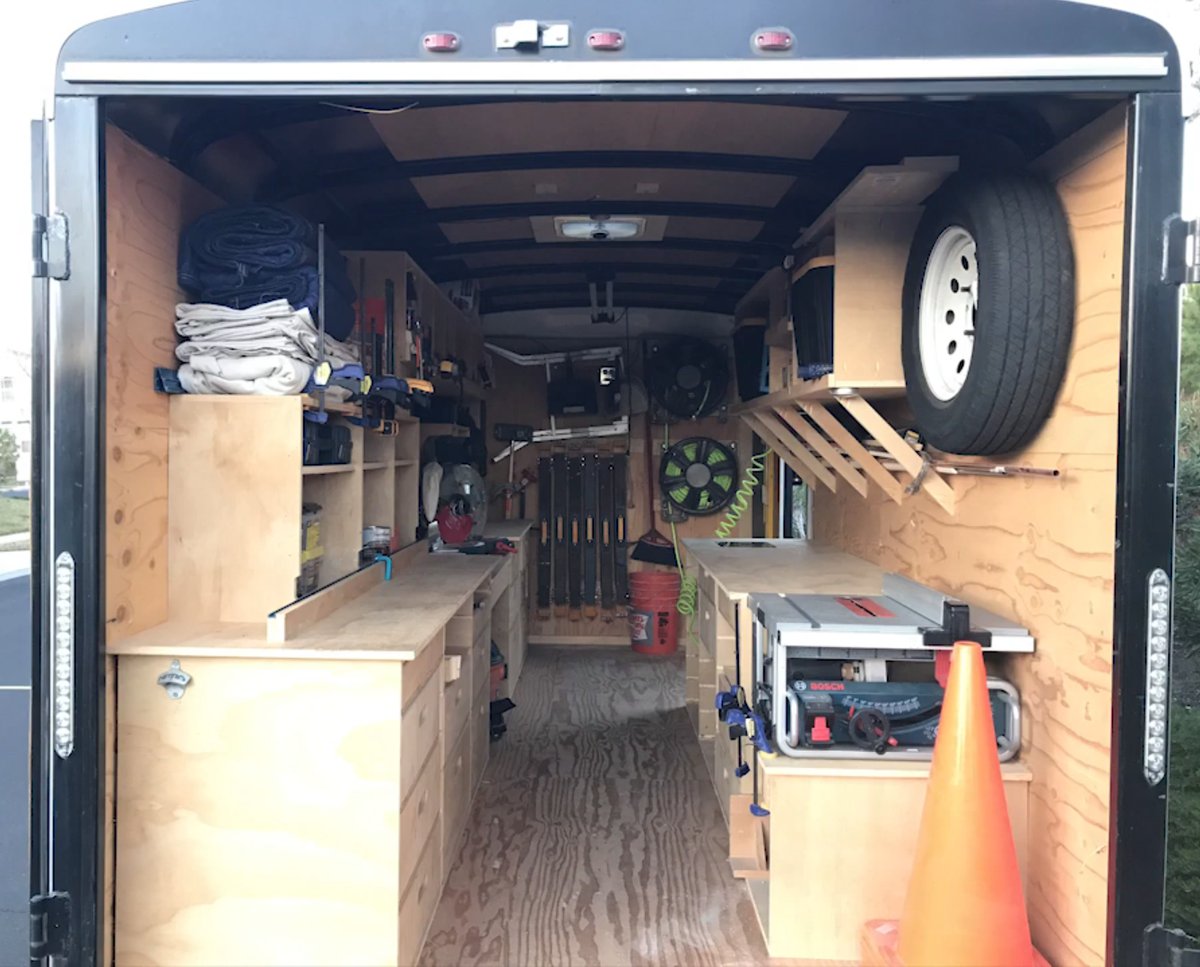
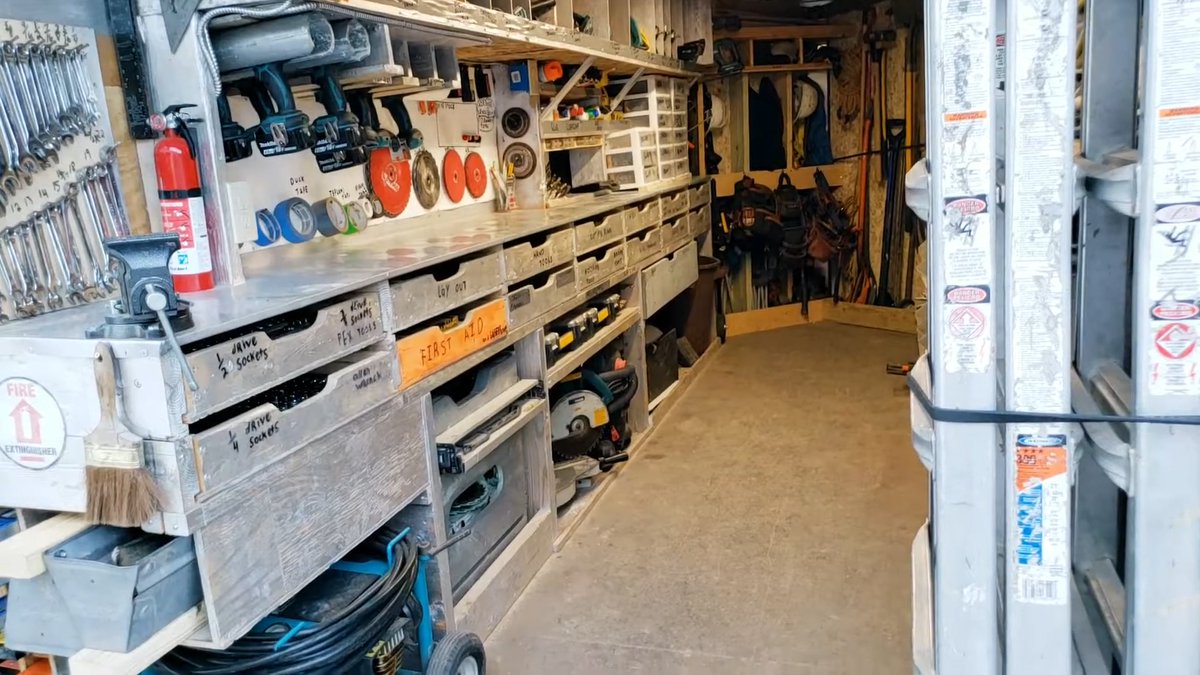
The Ron Paulk
This tool trailer layout was designed by a Ron Paulk, a builder and carpenter who has made several iterations of this design.
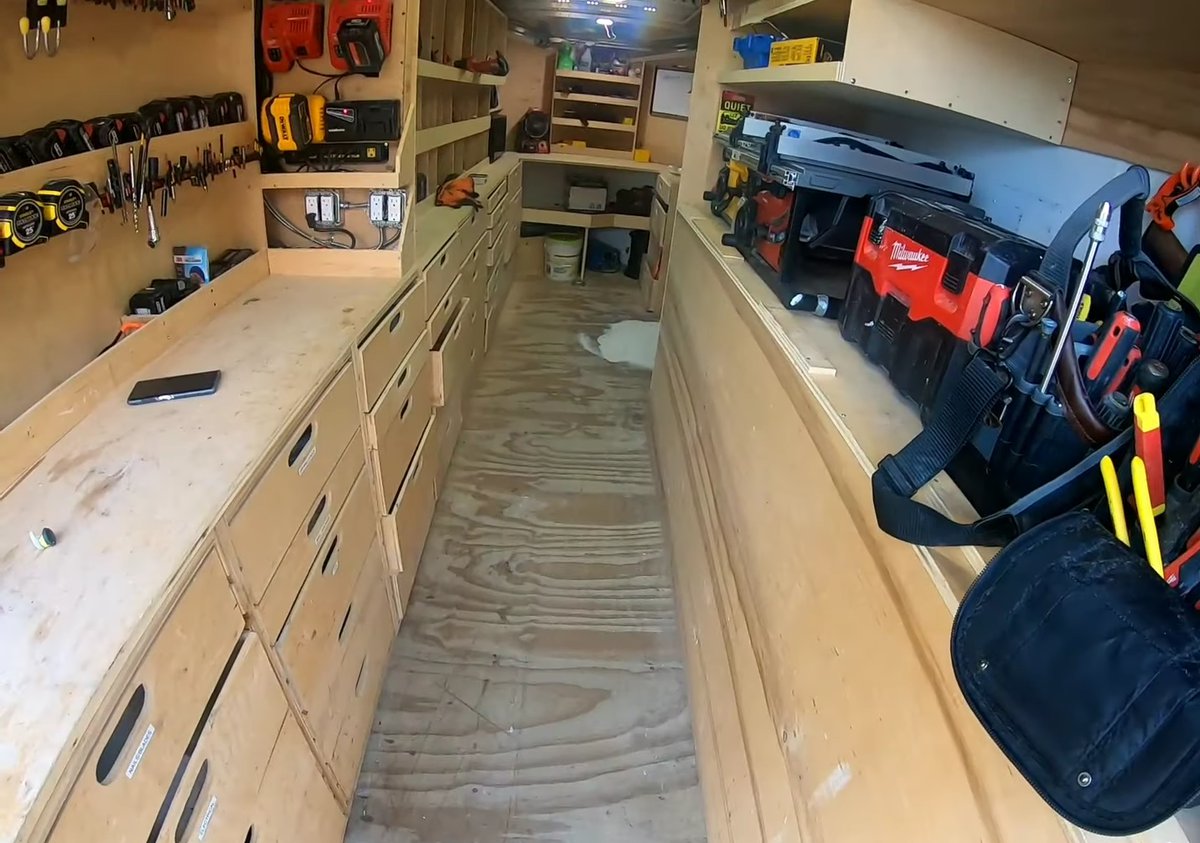
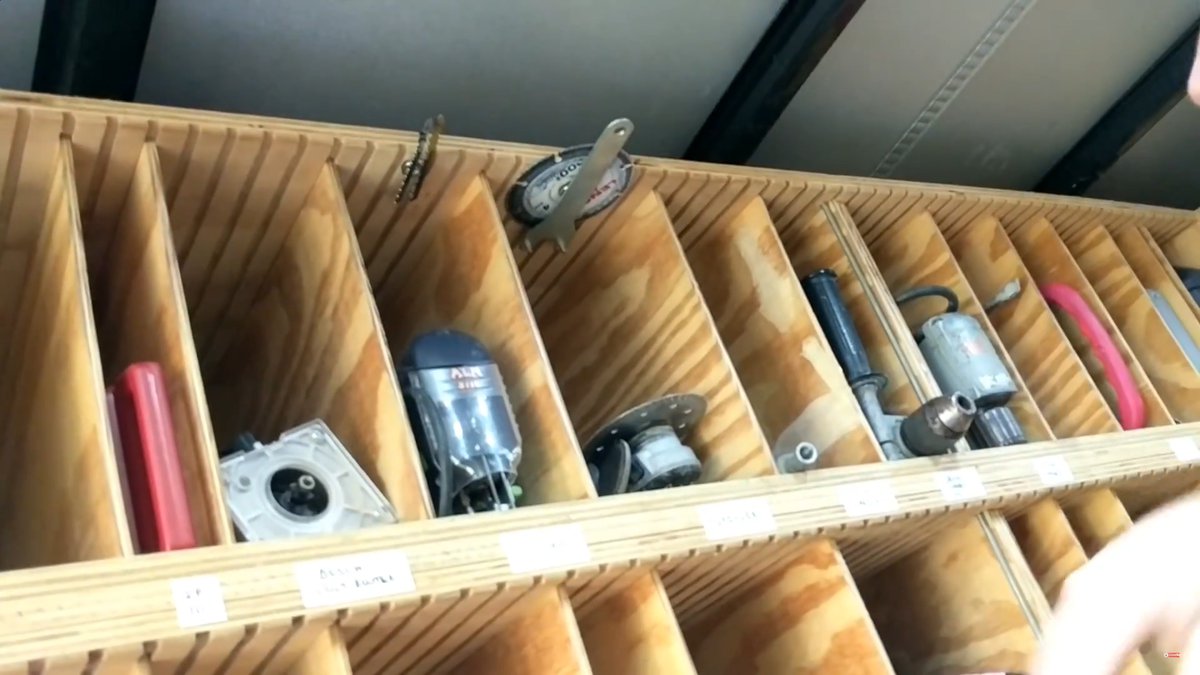
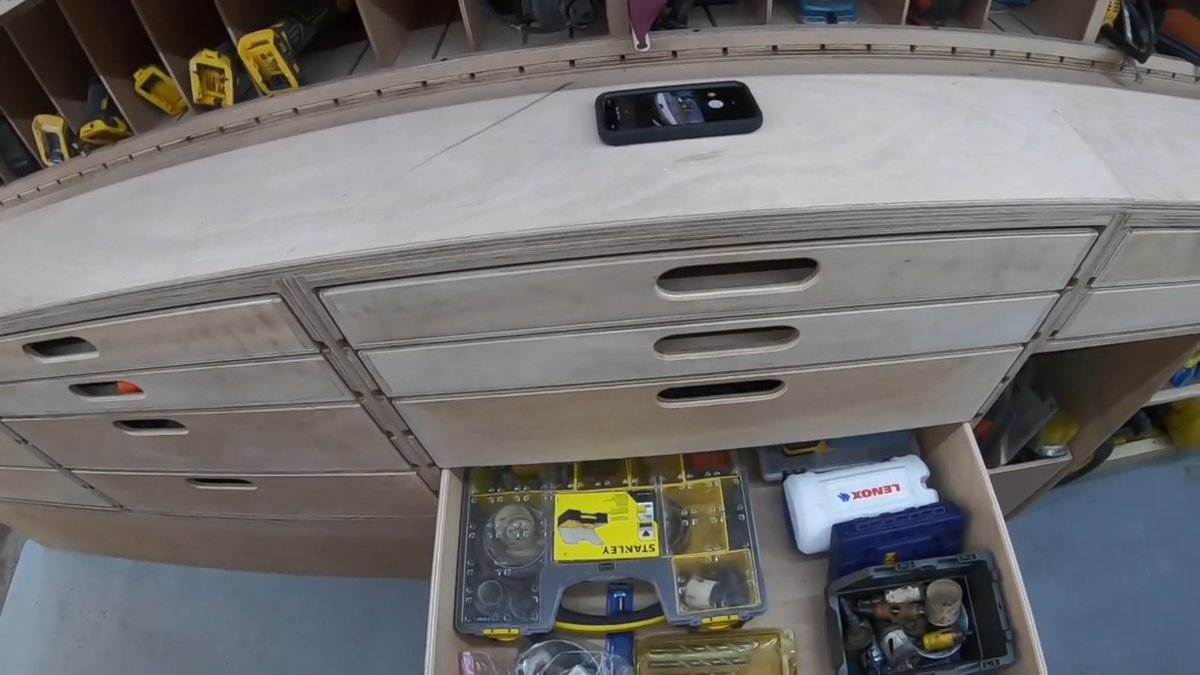
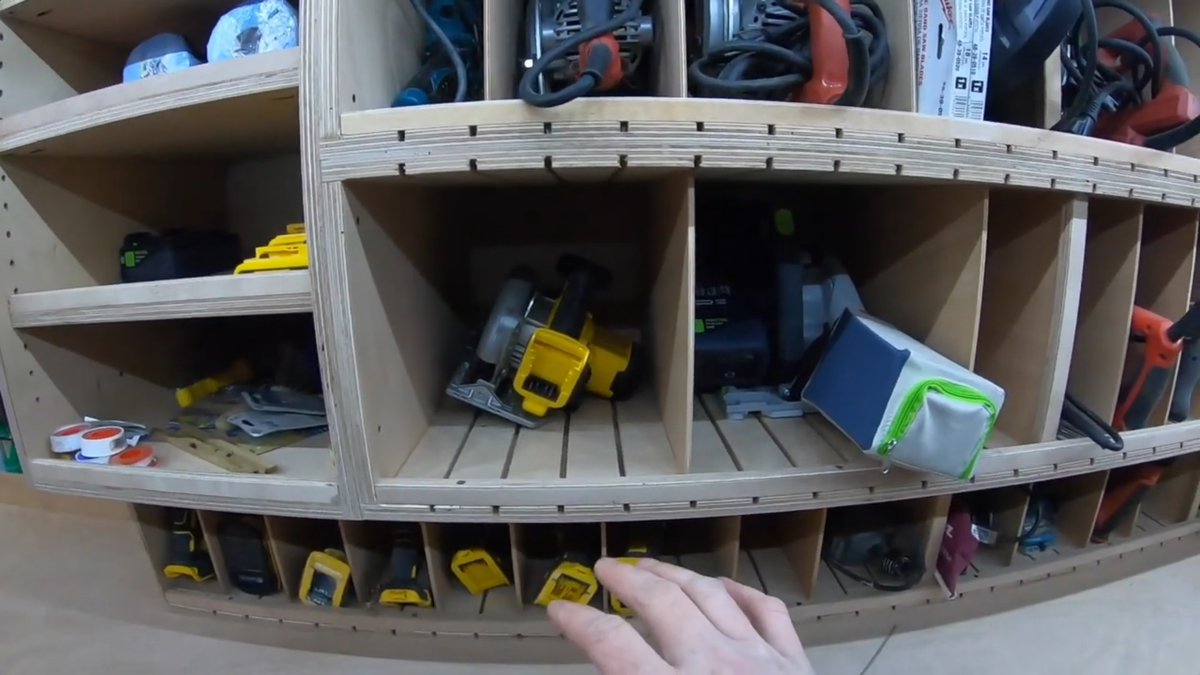
The Ron Paulk layout is characterized by its tool cubbies, sheet and long material storage, and lots and lots of plywood drawers.
A strict Ron Paulk build will also include his work table and other helpers that are meant to help with his style of working.
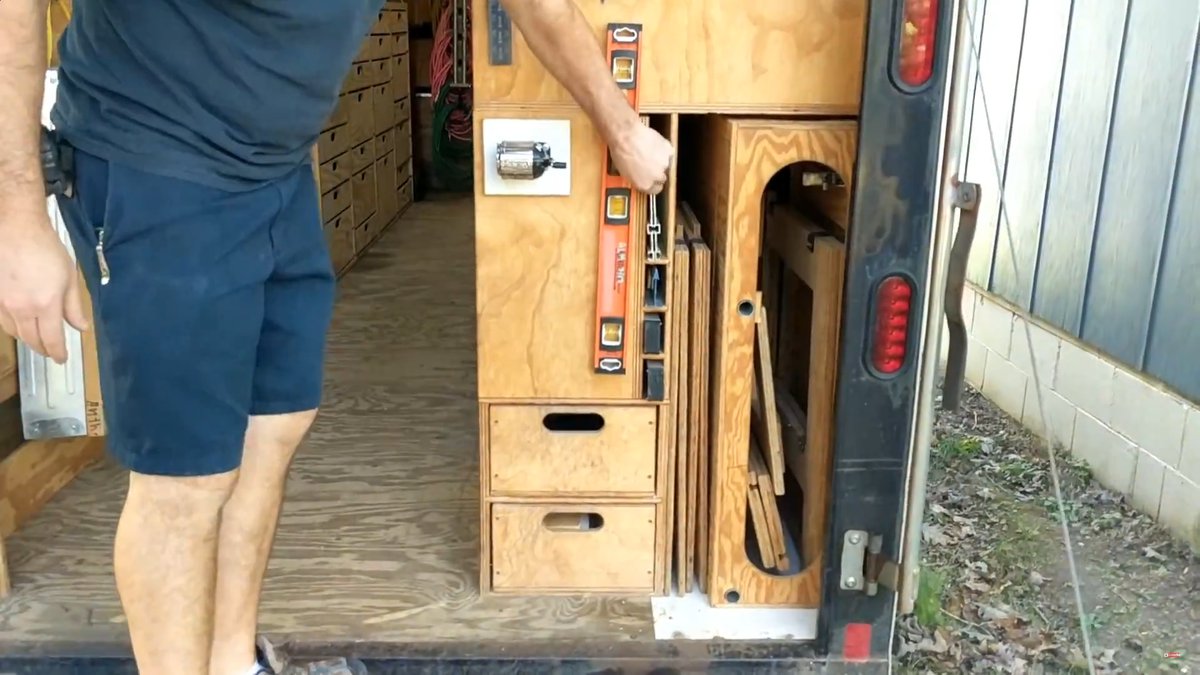
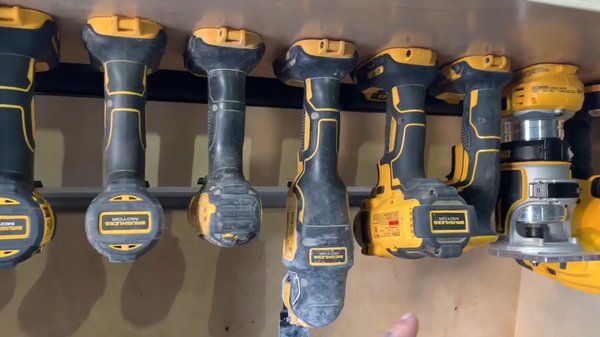
The tool cubbies are the cornerstone of the organization. Bare, individual tools are stored with a few consumables and change out tools. For instance, an angle grinder would be stored with some extra wheels and its wheel wrench.
Tools for the day are carried onto the job site (some use a bin for this) and then put back at the end of the day. Everything has a place, the job site stays uncluttered, and you can detect missing tools by checking for empty cubbies.
Sheet goods, levels, long lumber pieces, and other large materials/tools you'd use in contracting have dedicated compartments on one side of the trailer. This is an easy way to manage scraps, get huge things out of the way, and protect delicate tools like levels.
Plywood drawers are used for small tool and material storage. Drawers fit into dadoed verticals and have heights that allow for easy swapping (i.e. changing out one tall drawer for two short drawers).
This trailer layout has a small or no interior work area, which means that you'll need to work either inside your job site or in the outdoors.
This is great for long term projects, like renovations, where you expect to be on the job for several days or more. You setup your work table, sawhorses, and a few tools onsite, and you may leave them each day to reduce setup and teardown time the next day.
Not everyone likes the tool cubby workflow, picking and toting tools onto the job site, so consider that before using this trailer layout.
If you're interested in building this style of trailer, you can learn more and buy plans at Ron Paulk's website here.
Check out:
- Richard's Independent-Power Handyman Trailer
- Anthony's No-Toolbox, No-Tie-Down Remodeling Trailer
- Fenloe & Bell's Neat Aluminum and Plywood Construction Trailer
Layout #3: The Material Hauler

The Material Hauler layout works for tradespeople that use their trailer for double-duty: toting tools and bringing materials to the job site.
This might include things like:
- Cabinets assembled off-site.
- Appliances that you're installing in a kitchen remodel.
- Large amounts of sheet goods like drywall and plywood.

Material Haulers can be set up in different ways:
- Simply leaving a large, empty space between shelves that will fit whatever units you need to haul.
- Using toolboxes that you can remove to create more space.
- Buying a bigger trailer.
A typical Material Hauler for a cabinetry carpenter will feature a 40" minimum clear interior width in order to fit cabinets. HVAC techs can plan their shelf system to fit 2 HVAC units in a van, while still retaining the ability to carry tools and materials for installs.
Before going with a Material Hauler layout, make sure you weigh the pros and cons of the setup. Will the layout impede your workflow during the day? Is it better to spend money on delivery rather than picking up 50 sheets of drywall? Water heaters and cabinets are relatively easy to haul, but this isn't true of all materials.
Check out:
- Michael K's Fit-Big-Stuff Construction Trailer
- Lehigh Plumbing's Workshop Trailer
- Son of a Carpenter's Fully Custom Carpentry Van Build
- NS Builders Cabinets-Only Installation Van
- Noah's HVAC Install Milwaukee Transit
Layout #4: The Toolbox Carrier

Do you love Milwaukee Packouts, DeWalt toolboxes, Festool Systainers, or one of the other toolbox sets that are out there?
The Toolbox Carrier layout is for you!
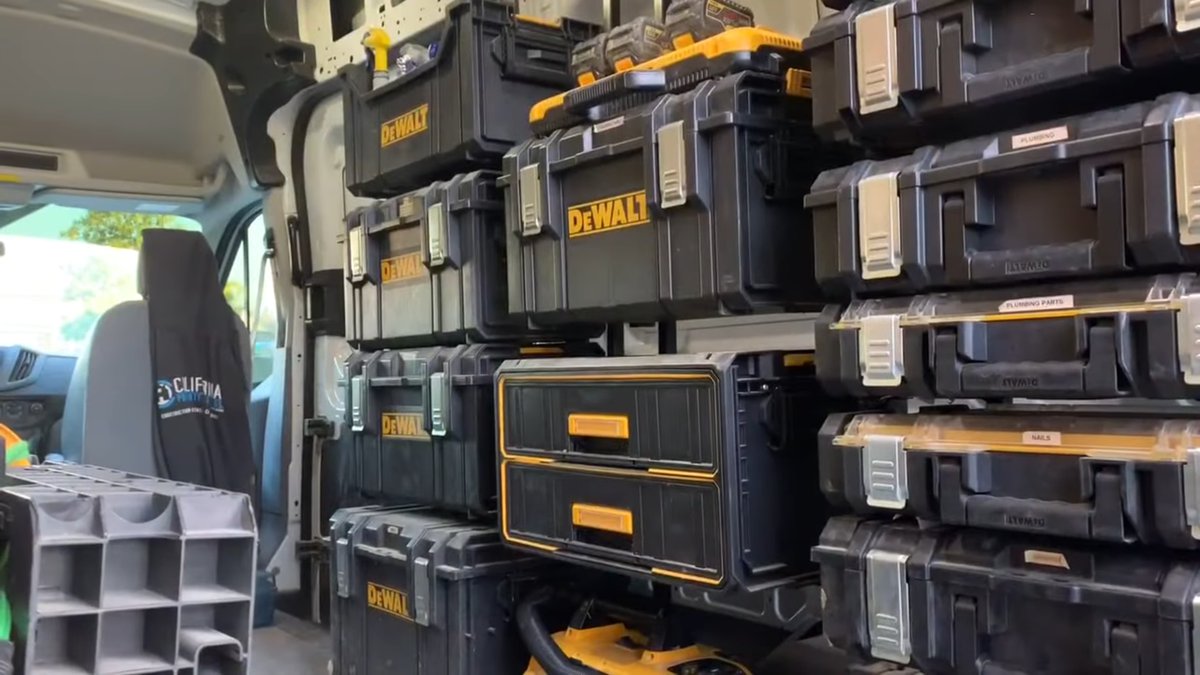
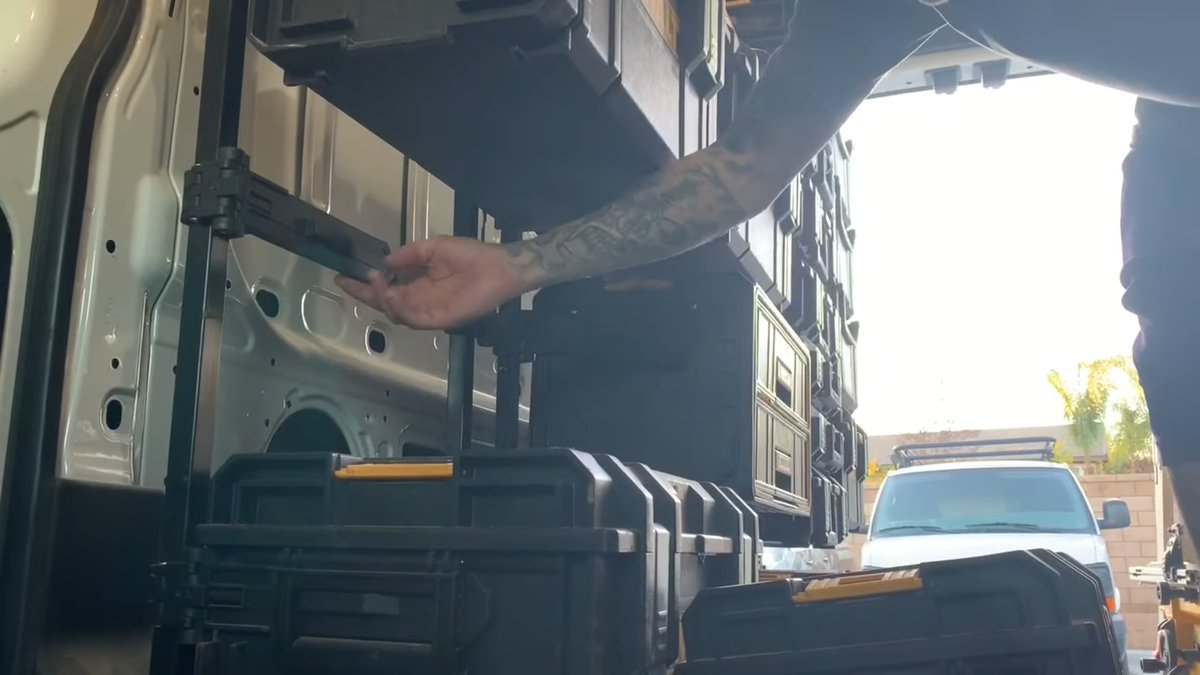
This layout may or may not use shelving. Installations that use shelving typically use tilted plywood shelves (or routed recesses for toolbox feet) to keep toolboxes in place during driving.
Alternatively, factory-provided mounts can attach toolboxes to trailer walls. This system can allow you to remove toolboxes completely so that you have space for hauling large items.

The Toolbox Carrier layout is ideal if you like to use Job Kits. Job kits are groups of tools and materials that help you complete a predictable type of job, like installing a toilet. If you're installing a toilet, you know what tools and parts you need to do a typical toilet install. Build the kit and replenish the consumables as necessary.
Job Kits can be built for things like:
- Toilet install and repair, with bolts, rings, valves, supply lines, hacksaw, and wrenches that fit toilet hardware.
- Residential ProPress, with the tool, 1/2" and 3/4" dies, and a pipecutter.
- Cabinetry installation, with a drill, driver, and common cabinetry hardware.
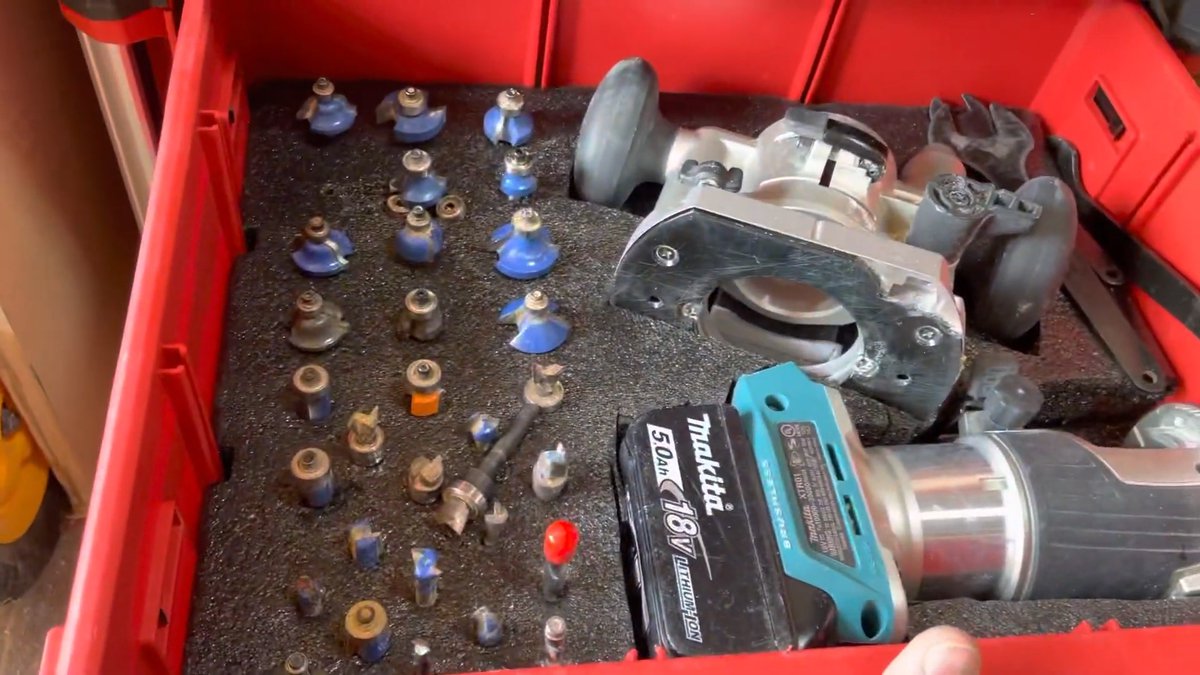
Job kits save you time by:
- Being in a ready-to-go state. Instead of collecting tools and parts to do a job, you grab the "toilet kit" when the service call is for a leaking toilet.
- Preventing repeated trips to your work van or trailer.
This layout can cause a different working style and some people have found it difficult to make the system work for them in an efficient way.
Check out:
- Noah's HVAC Install Milwaukee Transit
- Stephens Brothers' DeWalt-Filled General Contracting Work Van
- InsiderCarpentry's Clean Trim and Millwork Truck
- Zack Dettmore's General Contracting Carpentry Van
Layout #5: The Tool Display
The Tool Display layout is common on trailers used for crews that do large projects like framing.
This layout is usually used on large trailers that carry lots of inventory, ladders, and multiples of the same tool. Tools are very easy to grab and the shelves themselves require less setup than something like a tool cubby or plywood drawer.
The Tool Display layout is also used on a smaller scale by mounting tools in PVC holsters or battery clip mounts.
One feature of this layout is that it's easy to see if you're missing a tool. However, the layout doesn't work as well if you want to store bits, blades, wrenches, and other accessories with tools, as in a Ron Paulk layout. You'll have to grab those separately.
Check out:
- Horst Construction's Long and Tall Aluminum Framing Trailer
- Gingrich Construction's Efficient, Huge Framing Trailer
- Benjy's Practically Perfect 8x18 Framing Trailer
- Matt's Bleeding-Red Milwaukee Reno Trailer
Layout #6: The Combo and The Conclusion

The best enclosed trailer layout is going to be the one that you come up with yourself.
You'll most likely end up mixing and matching layouts from the above tool trailers, and you'll find that many of the examples above incorporate elements from different layouts. Fully committing to a particular layout (like the Toolbox Carrier) can be expensive and even a typical plywood tool trailer build will take 2-3 weeks of valuable time.
Keep your workflow and how you work at a job site at the top of your mind when designing your layout so that you can maximize your downtime due to mundane tasks like getting tools and materials or coiling extension cords.
If you need some inspiration, take a look at some of the work vans and tools trailers we've showcased here.
Get work trucks and tips in your mailbox.
Your time is precious. We write about organization, tools, and techniques that make tradespeople work faster and more efficiently. Subscribe to get our articles and tips in your inbox.
We will not spam you.